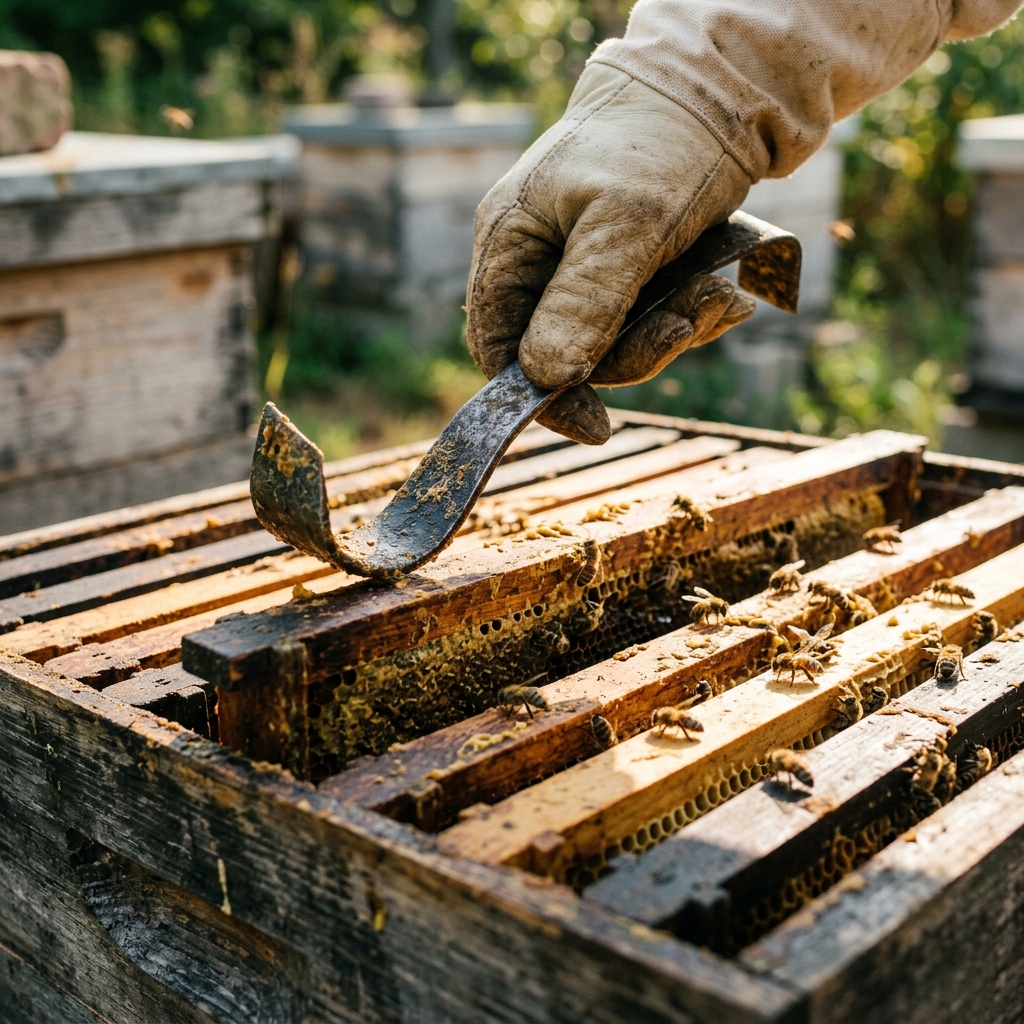
There is no single correct way to pry a frame loose. There is only a way that works without breaking the box, breaking the frame, or hurting bees in the process.
The best method is simple. Slide your hive tool into the seam between frames. Pry it up a little at a time. Prop the loose end over the wood next to it.
Then do the same on the other side. Once both ends are loose, wiggle the frame out by hand. Warm weather makes this much easier.
Why Frames Get Stuck
Frames get stuck because of propolis. Bees make propolis from tree sap and plant resin. They use it to seal gaps and glue things together.
Over time, it builds up between frames. It can hold two pieces of wood almost as tight as glue.
Heat changes how propolis acts, and the difference is bigger than most new beekeepers expect. On a cool day, propolis can feel almost as hard as dried cement.
On a hot day, that same propolis softens and gives way with much less force. This is the single biggest factor in whether a frame comes out easily or fights you the whole way.
If you know a hive has not been opened in weeks, plan your inspection for a warm part of the day. It will save you time, reduce how hard you have to pry, and lower the odds of cracking a frame or box in the process.
Types of Hive Tools
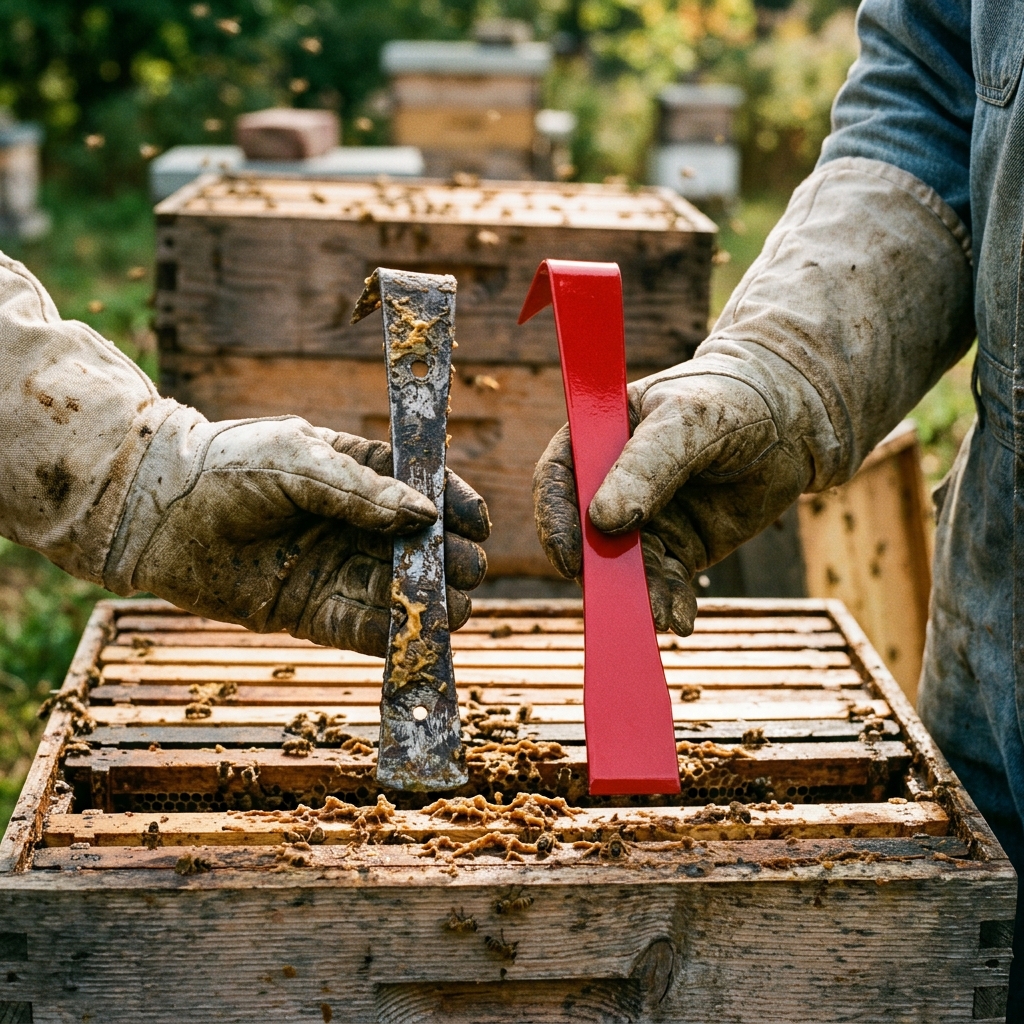
Most beekeepers reach for one of two main styles day to day, with a couple of extra options showing up as their kit grows. Here is how each one works and when it earns its place in your hand.
The Flat Hive Tool
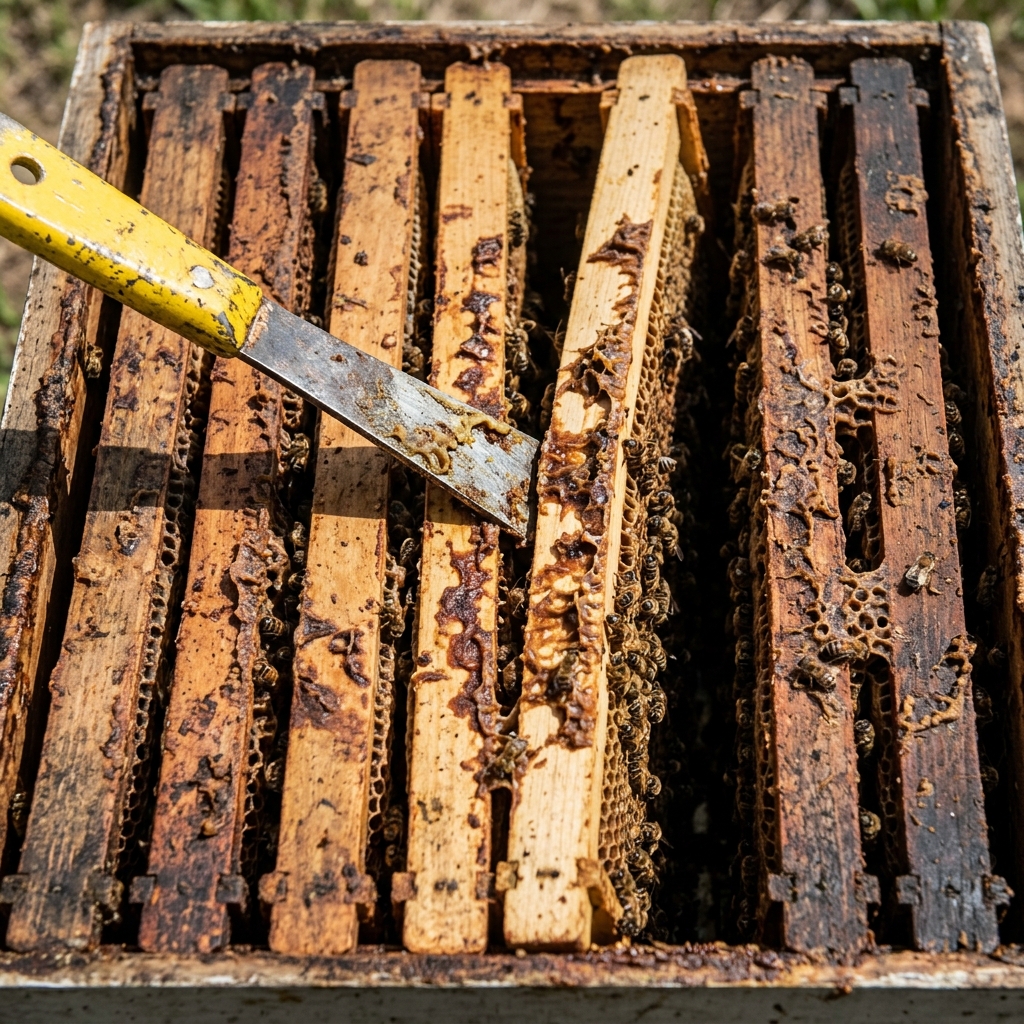
This is the classic flat hive tool most beginners use. It has a flat edge on one end and a hook or scraper on the other.
It is simple and strong. It has been around the longest, and a lot of beekeepers learned on this tool first.
But the flat edge gives less control than a J-hook. It is easier to push on the wrong spot and crack the wood.
The J-Hook Hive Tool
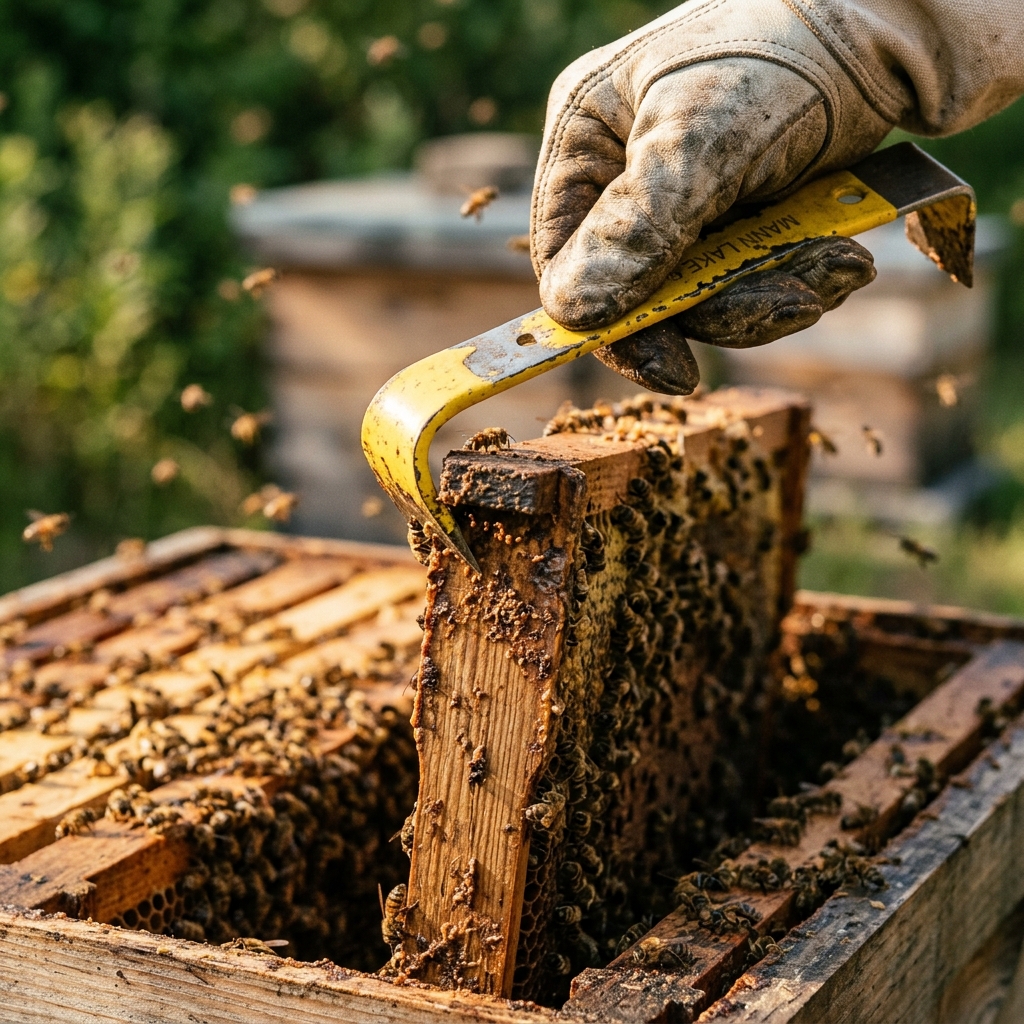
This J-hook hive tool has a curved hook shaped like the letter J. The hook slides between frames and catches under the frame lug.
This gives you better control when you lift. Many beekeepers switch to this style over time, since it makes stuck frames easier to handle and usually takes fewer steps to get a frame moving.
One tip. Check which side the bevel is on before you buy one. A hook with the bevel on the wrong side will not catch the way you expect.
If you're stuck with one that feels backward in your hand, some beekeepers regrind the bevel themselves rather than replacing the tool entirely. It's a real fix, but go slow and keep the metal cool while grinding. Overheating the steel during a regrind can ruin its temper, leaving the edge softer and less durable than it was originally.
Other Hive Tool Styles You May Come Across
A few other styles show up in bee supply catalogs. A frame lifter has a curved, fork-like end built just for sliding under the top bar and lifting.
A spur or serrated hive tool has a toothed edge on one side, made for scraping propolis and burr comb rather than prying.
You do not need every style to get started. Most beekeepers do fine with just a flat tool or a J-hook for years before adding anything else.
Flat Tool vs. J-Hook at a Glance
Swipe sideways on the table below if you're on a phone and it doesn't fit your screen.
| Feature | Flat Hive Tool | J-Hook Hive Tool |
|---|---|---|
| Best for | General prying, scraping, everyday use | Heavily propolized, stubborn frames |
| Control while lifting | Lower, easier to misplace pressure | Higher, hook catches the frame lug directly |
| Learning curve | Very easy to pick up | Slight learning curve at first |
| Risk of cracking wood | Higher if used carelessly | Lower once you get the feel for it |
| Cost | Usually cheaper | Usually a bit more |
Many experienced beekeepers end up keeping both in their kit rather than picking one for good. A flat tool covers general scraping and everyday prying, while a J-hook gets pulled out for the stubborn, heavily propolized frames where extra control matters.
If you are just starting out, either one is a fine first purchase. The flat tool is cheaper and simpler. The J-hook costs a little more but pays off once your hives start building up serious propolis.
Step-by-Step: Prying a Frame Loose
The exact motion changes a little depending on which tool is in your hand. Here is how to work through a stuck frame with each one.
Using a Flat Hive Tool
This method takes a little more care, since the flat edge can put pressure on the wrong spot.
Step 1: Find the groove.
Look for the small gap between the top of the frame and the box. Slide your hive tool into that groove.
Step 2: Twist to raise it.
Twist the tool so the frame end starts to lift. Watch the wood closely while you do this.
If you see the wood flexing a lot before the frame actually moves, stop. That flex is a warning sign, and pushing past it risks snapping the wood. Keep your free hand out of the path of the tool in case it slips.
Step 3: Prop it up.
Once the end is raised, turn it with your hand and push it up and over the top of the wood next to it. This lets it rest there on its own.
Step 4: Repeat on the other end.
This time, try a slightly different angle. Push the tip in low, right where the wood starts, just below the top edge.
Try not to jab into the comb. Pry upward.
Step 5: Pinch and wiggle.
Once both ends are propped up, pinch the frame with your fingers. Work it side to side until it comes free.
Lift straight up slowly so you are not rolling or crushing any bees on the neighboring frames.
Using a J-Hook Hive Tool
This method is usually quicker once you get the feel for it.
Step 1: Slide it between the frames.
Push the hook down into the seam between two frames.
Step 2: Pry it up.
Twist or lever the tool so the near end lifts. Hold it in place with a finger if needed.
Step 3: Do the same on the other side.
Push the raised end against the box wall to hold it steady, then grip it and pull up.
Step 4: For a frame in the middle of the box.
Middle frames take a bit more care than edge frames, since they sit against comb on both sides instead of a box wall on one side.
First check for burr comb. This is extra comb that connects one frame to the next, usually a sign that bee space has been violated somewhere in the box. Cut it free before you lift, or you will tear the comb apart and risk crushing any bees caught in that spot.
Once it is clear, slide the hook under one end and raise it. Park it on the wall next to it. Do the same on the other end.
Step 5: Lift slowly.
Once both ends are up, lift the frame out slowly and gently. Do not rush this part, especially with a honey super frame, since a fast pull can tear open capped honey.
Going slow and rocking the frame side to side, rather than pulling straight up, protects both the comb and any bees nearby.
Working Around Bees While You Pry
Prying carefully protects your equipment. It should also protect your bees. A few habits help with both at once. If a hive is already agitated before you even start, it's worth reading the guide on working defensive bees safely before continuing.
Lift slowly rather than yanking, since a fast motion is what usually rolls or crushes bees sitting on the comb surface.
Save any heavy scraping of propolis or burr comb for the end of your inspection, since the vibration from scraping tends to agitate the colony more than gentle prying does.
Before you set a frame or box back down, take a moment to check that no bees are sitting where two surfaces are about to meet.
On cooler days, be mindful of how long you leave a frame of capped brood exposed while you work. Pupae sealed in capped cells are more sensitive to cold than eggs or larvae still open to the warmth of the cluster, and extended exposure below roughly 90°F can genuinely harm them. A normal, unhurried inspection isn't a problem, but avoid leaving brood frames sitting out any longer than necessary on a cold day.
Sterilizing Your Hive Tool Between Hives
A hive tool touches every frame you pull, which means it can carry disease from one hive to the next if you are not careful. This matters most with serious brood diseases like American foulbrood and European foulbrood, which can spread through equipment.
If you are moving between hives, especially between different apiaries, it is worth cleaning your tool in between. A few common methods work well:
- Rubbing alcohol. Wiping the blade with rubbing alcohol between hives is quick and effective. Some beekeepers keep a small container in their kit just for this.
- Flame. Passing the tool through a flame, such as the fire in a bee smoker, will kill most pathogens on contact.
- Diluted bleach. A diluted bleach solution followed by a full rinse is another option many beekeepers use at the end of a day of inspections.
This step is easy to skip when you are moving quickly through several hives, but it is one of the simplest habits that protects your whole apiary.
For more detail on cleaning and sterilizing beekeeping equipment, university extension programs publish solid reference guides, including this one from Utah State University Extension.
Putting Frames Back In Without Damage
Getting a frame out carefully is only half the job. Be just as careful sliding it back in.
Do not force it or tear the wax as you set it back into place. Bees can repair small damage, but a torn frame makes extra work for them and creates a sticky mess in the box.
Take the same slow, steady approach you used to remove it, and give bees a moment to clear the edges before the frame or box comes fully back together.
Common Mistakes to Avoid
These are the slip-ups that cause the most cracked frames, torn comb, and stressed colonies. Most are easy to fix once you know to watch for them.
- Prying on thin wood. If the wood bends a lot but the frame does not move, you are in the wrong spot.
- Jabbing into the honeycomb. Keep your tool in the wood, not the comb.
- Pulling too fast. This tears open honey and increases the odds of crushing bees. Go slow once both ends are loose.
- Working in cold weather when you don't have to. Wait for a warmer part of the day if you can.
- Forcing a frame that will not move. Stop and check where it is stuck. Try a different spot.
- Skipping the burr comb check on middle frames. This is the easiest way to tear comb by accident.
- Forcing frames back into place. This can tear wax just as easily as pulling them out wrong.
- Moving hive to hive without cleaning your tool. This is one of the easiest ways to spread disease between colonies.
There Is No One Right Way
New beekeepers often look for the one correct method. There isn't one. Any method that gets the frame out without breaking it, and without hurting bees in the process, is a good method.
Some beekeepers describe it simply as working the frame back and forth until it comes loose. That is really all it takes. Over time, you build a feel for how much force is normal, and that feel matters more than the exact tool you use.
Be careful with any beekeeping advice that claims there is a secret trick or one true expert. Beekeeping has room for many styles.
Most of the skill comes from practice. You learn how much resistance is normal. You learn when to stop before you break something.
Seasonal Checklist for Easier Frame Pulls
A quick reference for how frame difficulty shifts through the year, so you can plan your inspections accordingly.
- Early season: Frames come apart easier since propolis has not built up yet. Good time to practice your technique.
- Mid-season: Propolis builds up fast. Pick a warm afternoon for inspections.
- Honey harvest: Use the same steps on honey super frames. Slow down the final pull to protect the capped honey. See the guide on testing honey moisture before harvest to confirm a frame is actually ready.
- Late season, before winter: Frames may be more stubborn as it gets cooler. Give yourself extra time.
Frequently Asked Questions
Should I start with a flat tool or a J-hook?
Either works fine as a first tool. The flat tool is cheaper and simpler to learn on. The J-hook gives more control on stubborn frames once you're comfortable with basic technique. See the comparison above for a fuller breakdown.
Can I fix a J-hook tool if the bevel feels backward in my hand?
Yes, some beekeepers regrind the bevel themselves rather than buying a new tool. Go slow and keep the metal cool while grinding, since overheating the steel can ruin its temper and leave the edge softer than before.
Why do my frames keep cracking when I try to remove them?
Usually it's one of two things: prying against thin, unsupported wood instead of the actual joint, or trying to pry on a cold day when propolis is hard and brittle.
If you notice the wood flexing a lot before the frame actually moves, that's an early warning sign. Stop, reposition your tool closer to the seam, and try again rather than pushing harder in the same spot. Waiting for a warmer part of the day also makes a real difference, since propolis grips much less firmly once it warms up.
Are middle frames harder to remove?
Yes, a little more than frames on the edge of the box. Edge frames only touch comb on one side, since the other side faces the box wall. Middle frames touch comb on both sides, so there's more chance of tearing something if you pull without checking first.
Always look for burr comb, the small bits of comb connecting one frame to its neighbor, and clear it before you start prying. Once that's done, the same lift-and-park technique used on edge frames works just as well here.
How do I avoid tearing honeycomb when I pull a super frame?
Lift slowly once both ends are loose, and rock the frame side to side instead of pulling straight up. A fast, straight pull is the most common cause of torn comb, since capped honey tears much easier than empty comb.
This matters most during harvest season, when your honey supers are full and every frame you handle is heavier and more fragile than usual. Taking a few extra seconds per frame is a small trade for not losing honey to a torn comb.
Will I damage the hive if I don't get the technique perfect?
Not usually. Small mistakes are a normal part of learning, and bees are more forgiving than beginners expect.
The main thing to watch for is the wood flexing a lot without the frame moving. That is your signal to stop, reset, and try a different spot rather than pushing harder.
Do I really need to clean my hive tool between hives?
Yes, especially if you keep more than one hive or visit more than one apiary. A hive tool touches every frame it works on, so it's an easy way for disease to move between colonies without you ever noticing.
A quick wipe with alcohol between hives only takes a few seconds and is one of the simplest habits you can build into your routine. See the section above for a few different methods.